I had a few Birthdays that I needed to make cards for this month and this is what I came up with:
It was my friend, Desiree"s Birthday last week but she is still grieving the loss of her Dad so I wanted to make her a card that not wished her a happy birthday but also has a very peaceful feel to the card. I got the idea from the Splitcoaststampers website and its called a Triple Easel Card.
Another birthday card for my friend, Leoni that is mad about cats just like me and she has a new kitten in the house named Neo so I decided to do a cat themed birthday card for her. Its called a Window layer card also from the Splitcoaststampers website and I added an additional pocket in the back of the card to put a tag in for a message. Love the idea but there is no where to right a message on the card except the back.
This was a first that I had heard about Monster High. This was for a friends daughter that turned 9 a few days ago. Monster High is her new fad so I decided to work with this as a theme. Found the logo on Google Images and cut it out with my Electronic cutter. Its a center step card and one of my favorite designs for a card at the moment and then blinged it up with a glitter brad. Embossed the Happy Birthday with silver embossing powder and added some washi tape.
This is another Window layer frame card
Hope I have inspired somebody to try a new style of card
Thanx for looking and do come back and visit with me again
Valerie
Showing posts with label Easel Cards. Show all posts
Friday, 2 August 2013
Friday, 3 May 2013
Mother Day cards
I found this idea for Mothers Day cards on the My Scrap Chick facebook page and I knew that I had to have the cutting file and make these for Mothers Day cards this year. Its the Teacup easel card and this is my version:
I am extremely pleased on how they came out and cannot wait to see my Mother-in-law and Mothers face when they open these!!
Check out the My Scrap Chick webiste as well and explore all the beautiful work and creations
See ya
I am extremely pleased on how they came out and cannot wait to see my Mother-in-law and Mothers face when they open these!!
Check out the My Scrap Chick webiste as well and explore all the beautiful work and creations
See ya
Greetings to all
Greetings to all, I have a few projects to show you today, some of which I have been working on for a few weeks now. I do not know whats up with me lately but I seem to be taking on to many projects all at once instead of finishing one and the moving on to the next.
However, the first project is one I found on Youtube and its an Easel Post-it-note box card. My friend Tracy is a post it note fanatic so I had to try and make her one of these. Its a very simple and easy project but packs a punch on presentation.
I used Craft cardstock for the base and the patterned paper is from the Minds Eye collection. The flowers are handmade and I found the pattern on the Couture Creations blog. My latest craze is stick pins and I am having a heap of fun making them and I probable have used one is every project I have made in the last 2 months.
BUT moving on, my friend Tracy's, daughter has completed her degree in Marine Biology and is now studying to become a teacher. She carries her diary around with her where ever she goes so I decided to make her something in that line. Found the "Completed Dollar Calendar Mini" by papercrafter45 on Youtube which inspired me. I have used this idea but combined it with Kathy Orta's December Daily 2 project which is a gatefold mini album using the hidden hinge method. So I combined the two and come up with a Gatefold Calendar mini album.
This is the front over of the album, Vintage styled for her personality and I have used the same kind of flowers in this project as the previous one.Another stick pin!
This is the inside of the album once you open the cover. On the left hand side I have used Kathy Orta's pocket style and made a tag with the Public holidays and school terms. On the right is another pocket and tag with a calendar of 2014. The center is the first page of the album.
Open the flap and you have the completed month of January, these calendars I have made so that she can remove and replace for each year. There are 12 pages - one for each month and is put together in a gatefold style meaning one to the left and the next to the right and repeating the process.
There is a pocket on each front page of each month with a list of birthdays
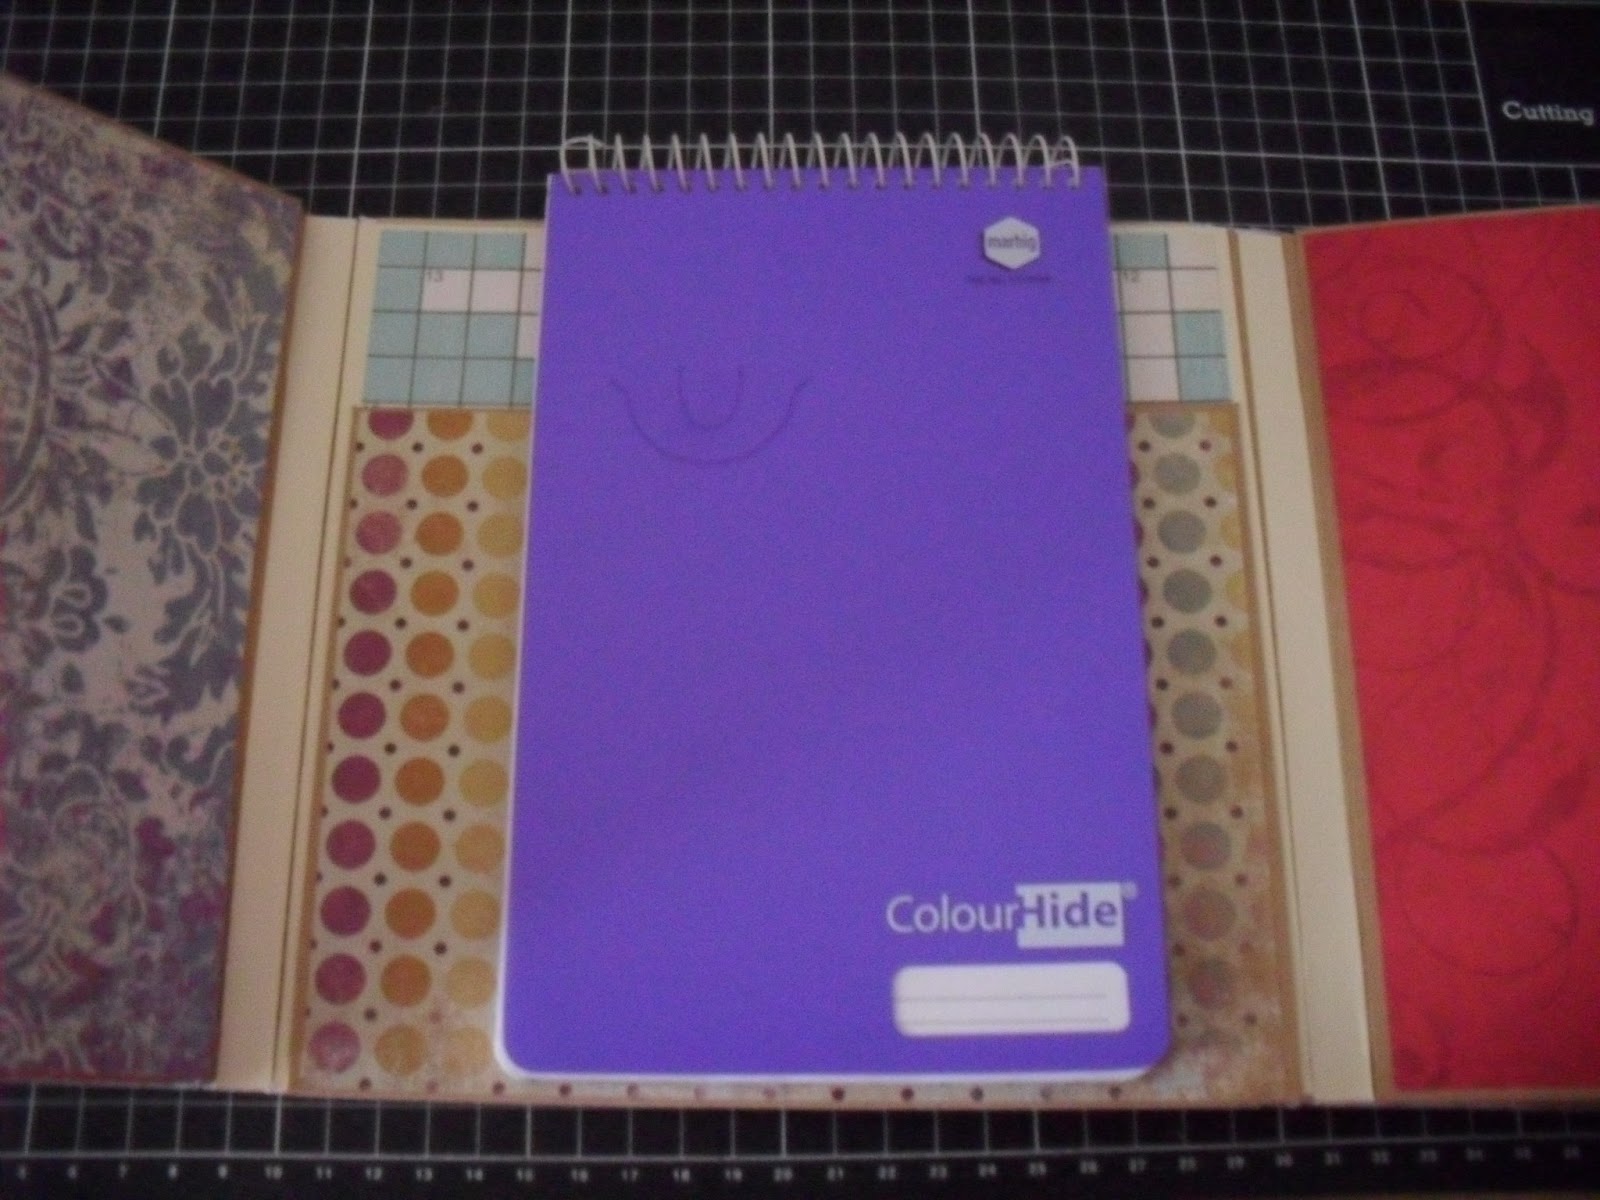
The very back of the album I have made another pocket and placed a notebook in it. Also done so that she can keep replacing as required.
Hope I have inspired somebody with this project and hope to hear from you guys as to what you think
See ya
Thursday, 4 October 2012
Twisted Circular Easel Card by Splitcoaststampers
Greetings to all, wish I could say that its warmed up here but no such luck. Still raining and miserable out there BUT its nice and cosy here in my Craft room and I have something special to show you today. I have mentioned before that I joined a group called "SPLITCOASTSTAMPERS". If you have not gone to visit this site then do yourselves a favour and head over there NOW!! http://www.splitcoaststampers.com/
This site is absolutely amazing and I have just received another of the "Weekly Inklings" called "Twisted Circular Easel Card.Here is the link to go and look at this tutorial: http://www.splitcoaststampers.com/resources/tutorials/twistedcirculareaselcard/
This is my attempt on this technique and let me know what you think!!!
Subscribe to:
Posts (Atom)