Monday 28 January 2013

Update on the 21st Burlesque themed party

So I have finally received a few of the pictures from my nieces Burlesque themed Birthday party and I am pleased to advise that it went down very well. Shanna looked stunning, everybody came dressed for the occasion and fun was had by all.

If you can remember I made her invitations and some of the decorations for the champagne bottles, Burlesque themed cupcake stand with fake cupcakes as decorations and Thank you tags for the quests. I had to make the individual parts and then post to South Africa for them to put together. My original idea was that the cupcake stand would be seen from all directions but in the end the only spot for it was up against a wall which made decorating the top as I pictured more difficult. However, I do think that my Mom did a good job of completing my project. Thank you for looking and come back soon. Leave comments if you please!!

Here are a few photos of the end results:

Cupcake stand with the decorations.

Corset decoratios for the champagne bottles.

Thank you tags for the guests.

This is my niece Shanna and her boyfriend, all dressed up for the occasion.
Shanna's corset birthday cake make by a friend !


Kaisercraft Hunt and Gather stamp set

Greetings all, This is another one of the stamp sets I bought off E-bay in Australia and with a friends husbands birthday coming up this week I figured I would play around with this Hunt and Gather stamp set to make him card.


I wanted to keep the card very plain and because he enjoys going fishing I decided to make the fish the focal point of the card. I started with a white linen card stock base. Stamped "Happy Birthday" on the front and then on a piece of scrap white linen card stock I stamped the fish and coloured it in with my Spectrum Noir markers. I then embossed the fish with thick enamel clear embossing powder and while still hot I sprinkled over Twinklets diamond dust to give it some sparkle and represent the scales of the fish. Cut out the fish and adhered to the front of the card using gut and a gold bead so as to look like the fish had been hooked. I folded the washi tape to look like a flag. and Faux stitching and three green pearls completed the card.

The stamp set:


Thank you for looking and do come back again soon

Valerie


Sunday 20 January 2013

Engagement excitement

Good morning all, We received some really exciting news yesterday!! My husbands best friend has got engaged!! So excited but also a bit of a bummer as he lives in South Africa and we will not be able to make it back for the wedding!! Ok, so you are probable wandering why we are so excited about this news. Well, its a long story which I am going to cut short as not to bore you all. My husband and Joseph grew up together, went to school together and even after us getting married the bond was always there. In Josephs early 30's he became very sick and was on dialysis machines for many years. He was on the organ transplant list but was taken off at one stage due to him being too sick. There where quite a few times that we thought he was not going to make it through the night but he managed to pull through ever time. We left in 2008 to come to New Zealand and about 17 months later we got the phone call to say that he was on the way to theater for a new kidney and of course the rest is history. His fiancee has also had a kidney transplant - nothing like having something in common!!

So, I had to make them an engagement card to congratulate them both and this is what I came up with:

More girly than what I was planning to do in the beginning but for some reason the more I worked with the card the more I was pushed into the direction of pink! Cannot explain why but I am really happy with the result.

Thank you for looking

Valerie

Saturday 19 January 2013

Advanced Tape Glider

I am soooooooooooooo excited to let you all know that my ATG gun arrived this morning, I have been wanting one of these for months and I finally decided to purchase one this week. I bought mine locally so if you live in New Zealand and are looking for one then go to Creative Bugs online shop. Tracey is the owner of the website and online shop and she has lots of other yummy products as well!!


Thank you for making a turn in my crafty world and hope you come back soon

Valerie

Saturday 12 January 2013

Kaisercraft Technologic

This is one of the stamp sets that I purchased on Ebay from Australia and I have been looking for a reason to use them, so with a friends sons Birthday coming up on Sunday I grabbed at the chance to open the packaging!!

The card base is blue card stock, the patterned paper is Rosies Boys and their toys collection, which is from the Warehouse here in New Zealand. This patterned paper is matted with a navy blue card stock. The circle is yellow card stock - stamped with the gears from the stamp set. The Happy Birthday is from the Sullivans words stamp set. The robot is stamped on cool grey card stock and covered with glossy accents. The heartbeat stamp is on yellow patterned paper. Stitched with my sewing machine and some denim blue stripped twine finishes the card.

I had so much fun making this card so I hope that you like it!!

Here is a picture of the Technologic stamp set:


Thank you for looking


25 days to Christmas

Greetings all, This is one of the projects that is on my to-do-list that I never got round to for Christmas this year.

I bought a SVG file from the Lori Whitlock blog  for an Advent calendar/25 day countdown to Christmas and really wanted to make this but did not get to it. I have been playing with the sizes of this file to make it the size I wanted and that has taken the most time. I have to confess that I have glued the boxes shut so that you cannot open them. The reason why I did that is because when putting them together I had a clever thought that turned out to be a really stupid one which resulted in my box's not staying shut. I figured I would use this as an example and remake another one at a later stage but figured I would post the end result anyway!!

Hope you like:


The blue frame is like a box about 2" deep. The outside is 9 1/2" x 9 1/2" and the inside square is 7" x 7".
The little box's inside are 1 1/4" squares and attached together to keep them together and also attached to the back sheet of paper. The snowflakes are cut from white cardstock with silver glitter glue and cream pearls. The three big ones are matted with silver mirror cardstock. The Christmas tree is cut from light blue cardstock also matted with silver mirror cardstock. Decorated with crystal stickles and small cream pearls.
The lettering is Nutmeg American CRaft thickers. The box's are decorated with Christmas paper (brand unknown) and stamped with small snowflakes and embossed with silver embossing powder.

If you want to make this project for yourself go to:  www.loriwhotlock.com/blog/die-cutting and purchase the file from her online shop.

Thank you for looking

Monday 7 January 2013

40th Birthday

A good friend of mines 40th Birthday was on the 28th December and I unfortunately could not be with her on the day. I did make her a birthday card using one of my favourite techniques!! The egg shell mosiac technique and this is the result:

Its the first time ever I am have used two or more different colour cardstock on one flower/rose but the more I look at it the more I like it and it will probable be something I do more often!!

Thank you for looking

PS: Happy 40th Birthday Marinda!!!

Dust and protective covers for your Cricut machine

Greetings to all!! I hope that your holiday season was filled with many fun filled days and heaps of blessings however the New Year has arrived and as from today my household is back to normal. As normal as a household can be anyway!!

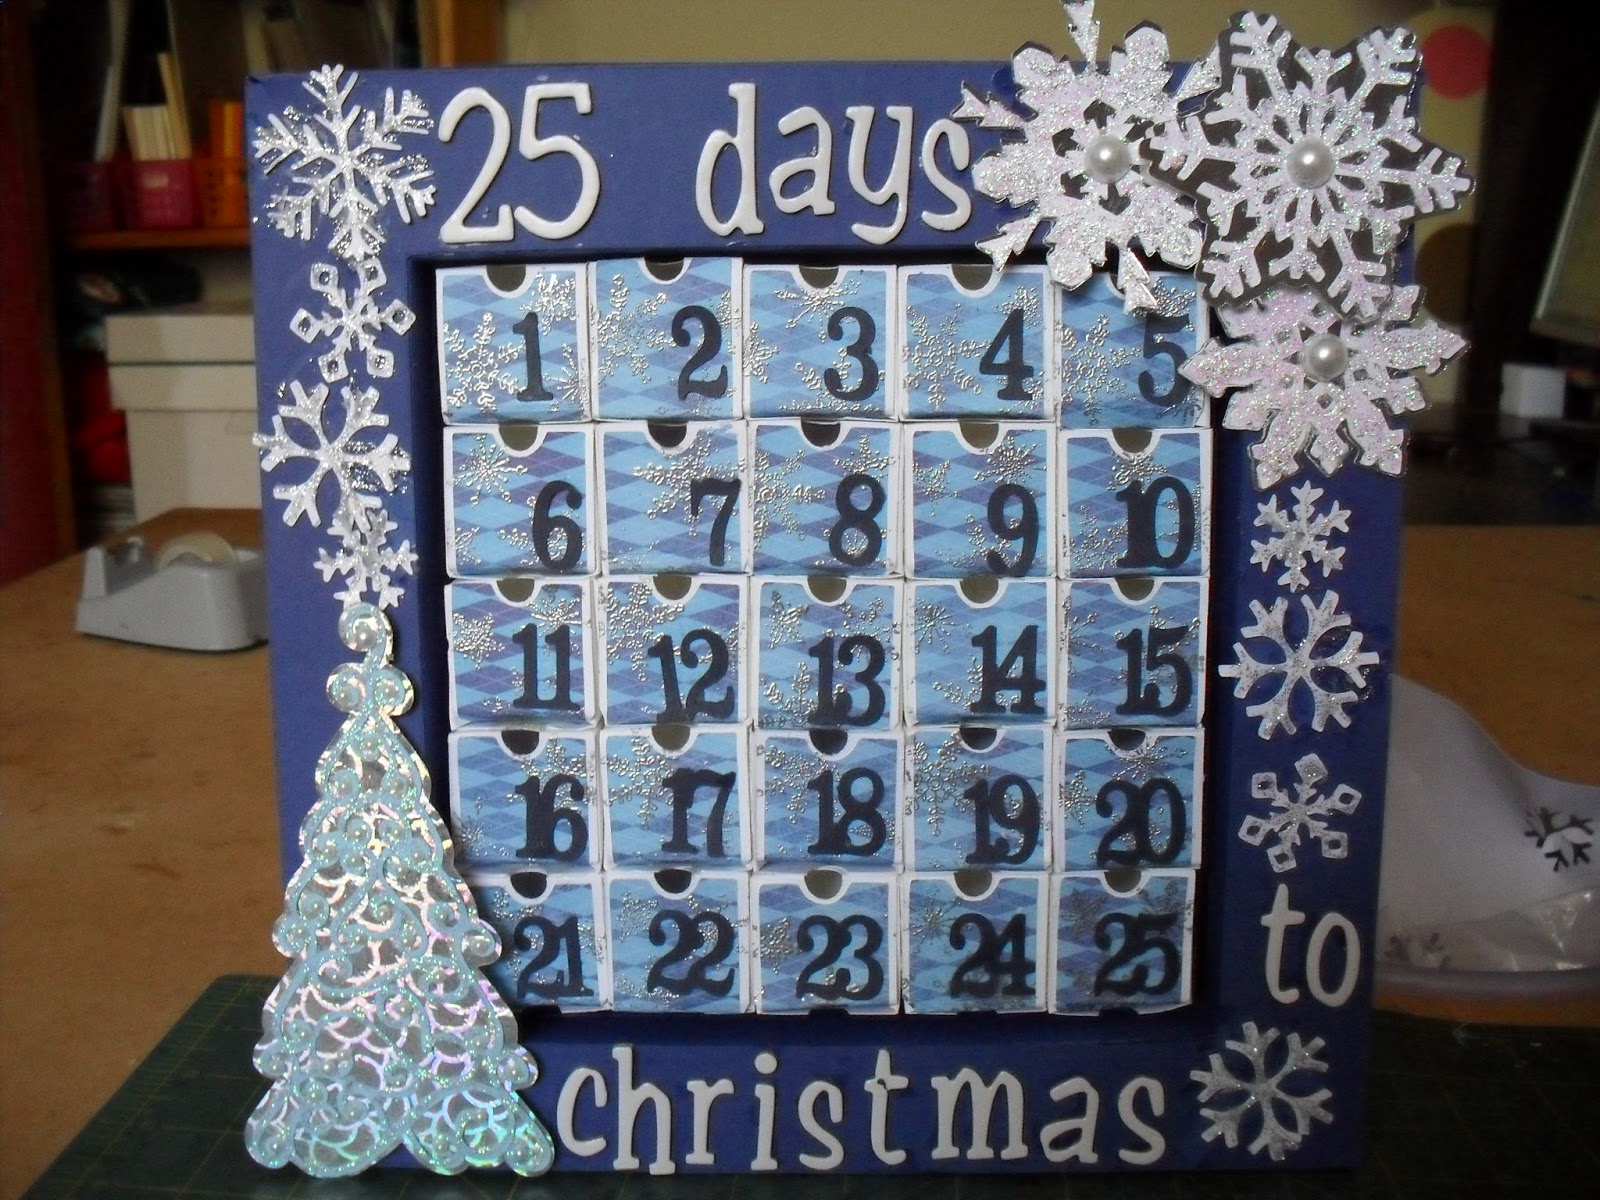
I took a break from Crafting over the Festive period and never got to do some of the projects I had lined up for Christmas. I have been meaning to make Christmas trees from polystyrene cones for my mantelpiece, 25 days countdown to Christmas and a few other bits and pieces. Mainly I want to concentrate on my Scraproom and getting it sorted. I think I have a pretty good organized room but that does not make for a pretty room and this will be one of the big projects for the year. So all these have been put on a to-do-list for the next few months. Keep tuned and hopefully I will have some photos to share soon!!  Its also my turn to choose a project for the Swap Group in Australia and I am thinking along the lines of "Artist Trading Cards" but need to think about it more!!

 However, the reason for this post is to advertise "Dust or Protective covers" for the Cricut machines. The cover is material which fits snug over the machine and closes with elastic band around the base which pulls it together. Really easy to put on and take off and is machine washable! I have made a few with material that I had laying around at home as examples:


 The first two photo's are for the Cricut Expression, which is the bigger 12" machine.


These three are for the smaller Cricut machines.

Prices are generally:

Cricut Expression: $15 (NZ) plus postage

Cricut personal: $10 (NZ) plus postage,

However because these will be made per order costs may differ depending on individual requests and material prices. If you are interested please contact me on papercreationsbyvalerie@gmail.com and the design and price can be discussed!! PS: I do not have the dimensions for the Cricut Expression 2 but if you can provide the dimensions I can see what I can do to accommodate!!

I am looking forward to a year of creating ahead and having fun learning new techniques! I hope that you all will join in on the journey!!

Thank you for looking!!